AN INTRODUCTION TO ROTATION 1
In this first of a 6-part series, we will be exploring everything you need to know about rotations and overlap rules in volleyball. In this article, we will be taking a deep dive in to rotation 1 in volleyball.
In serve-receive, rotation 1 allows for a fair amount of flexibility. Many volleyball teams start matches and sets in Rotation 1 (or Rotation 6 if they’re receiving serve), which adds a little bit of importance when it comes to setting up your athletes in effective formations.
It’s important that you know what the strengths and weaknesses of your front-row players are in rotation 1. More importantly, you should know WHY you’re running the offensive formation you are. Hopefully, the reason is based on effectiveness, data, and simplicity.
Rotation 1 - Player Positioning
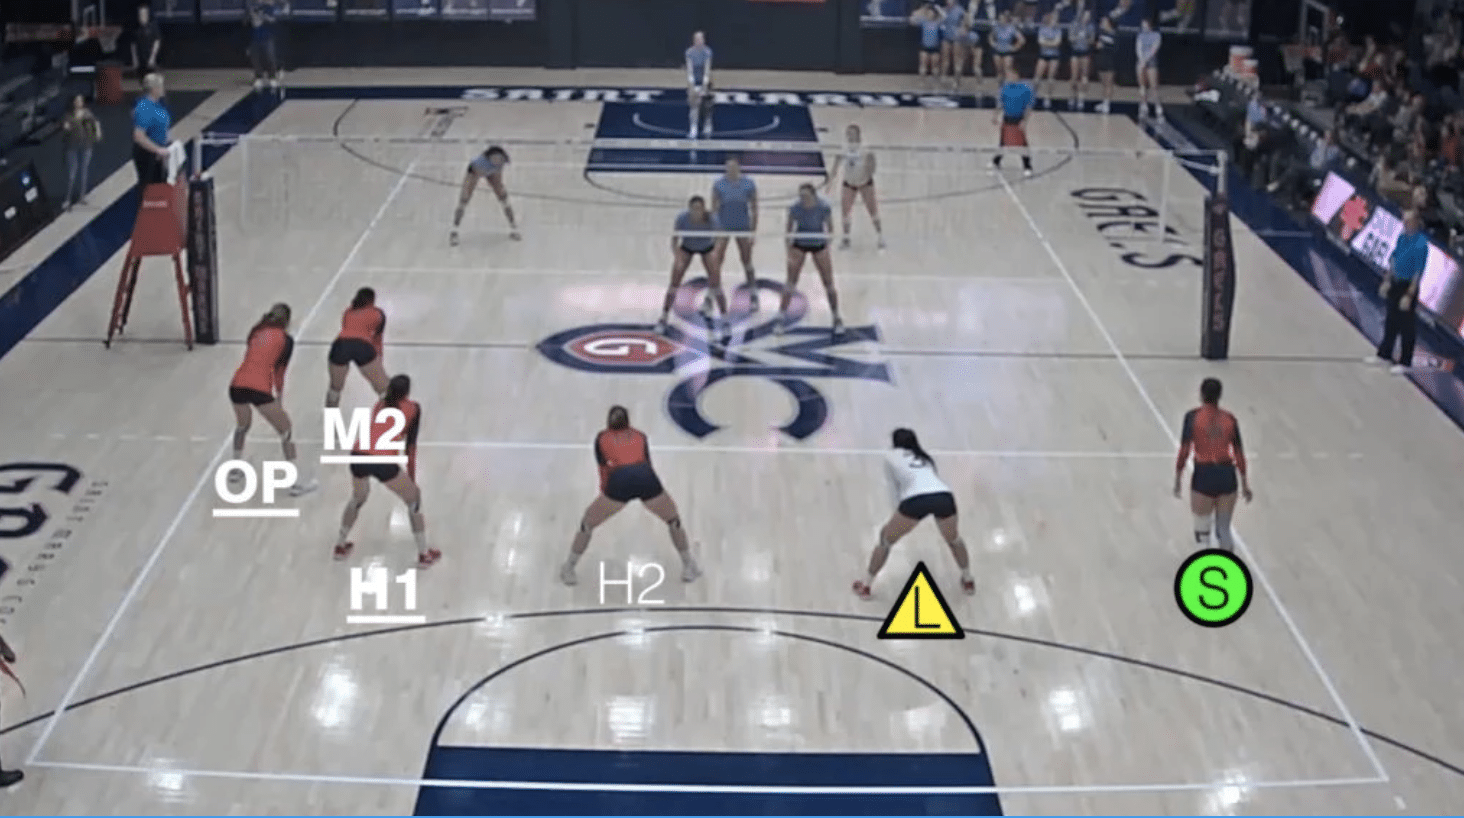
First things first, let’s take a look at where the athlete's setup in rotation 1.
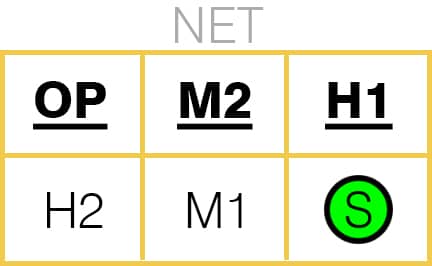
Bold & Underlined Text = Front Row Players
In a traditional 5-1 offense, there is 1 setter, 2 outside hitters, 2 middle blockers, an opposite, and a libero. Here are the descriptions of each player position:
Setter (S) - The setter's "base" or starting position in rotation 1 will be left-back. Often times serve-receive formations will be set up in a way that allows the setter to get into position using an efficient route.
Outside Hitter 1 (H1) - The H1 is the outside hitter closest to the setter. Typically, this should be the best outside hitter on the team because she will generally have more hitting opportunities than any other player.
Middle Blocker 2 (M2) - The M2 is the middle blocker two spots away from the setter.
Opposite (OPP) - The Opposite is a right side attacker lined up directly opposite of the setter.
Outside Hitter 2 (H2) - The H2 is the outside hitter two spots away from the setter.
Middle Blocker 1 (M1) - The M1 is the middle-blocker one spot away from the setter. Usually, the M1 will be the better offensive middle attacker because she will have more hitting opportunities than the M2. The M1 should also be a better slide hitter because she will have more opportunities to hit slides.
Libero (L) - The libero plays replaces the back row middle-blocker.
In Rotation 1, the setter is in Zone 1, followed by the H1, M2, Opposite, H2, and finally the M1 (the M1 is replaced by the libero).
In Serve-Receive, there are three common formations teams can line up in to prepare to pass and play offense. There are no right or wrong options here. The right thing to do is choose the best formation that allows your players to be most successful, and your team to side-out at the highest possible percentage.
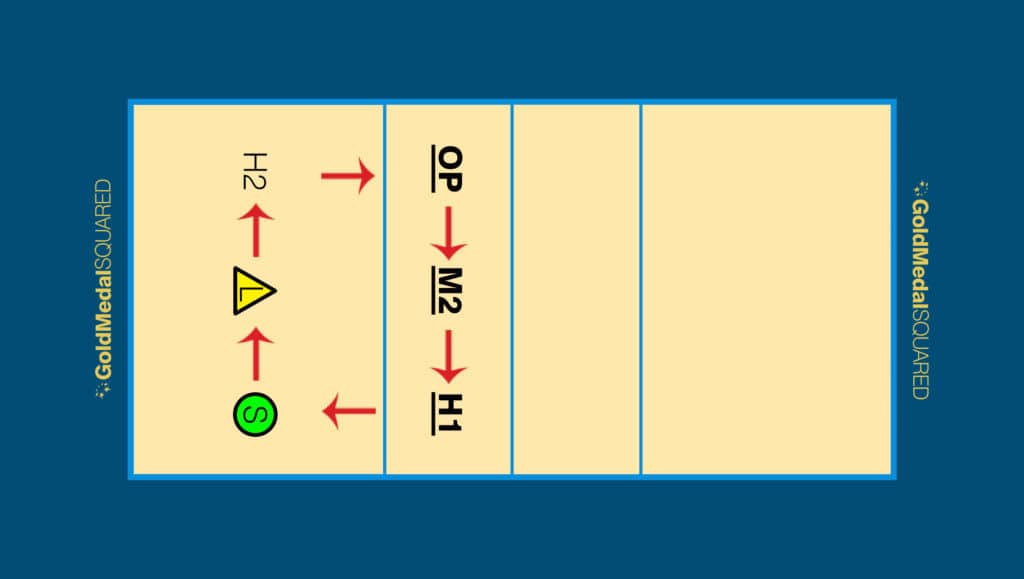
ROTATION 1 – Traditional Serve-Receive Option
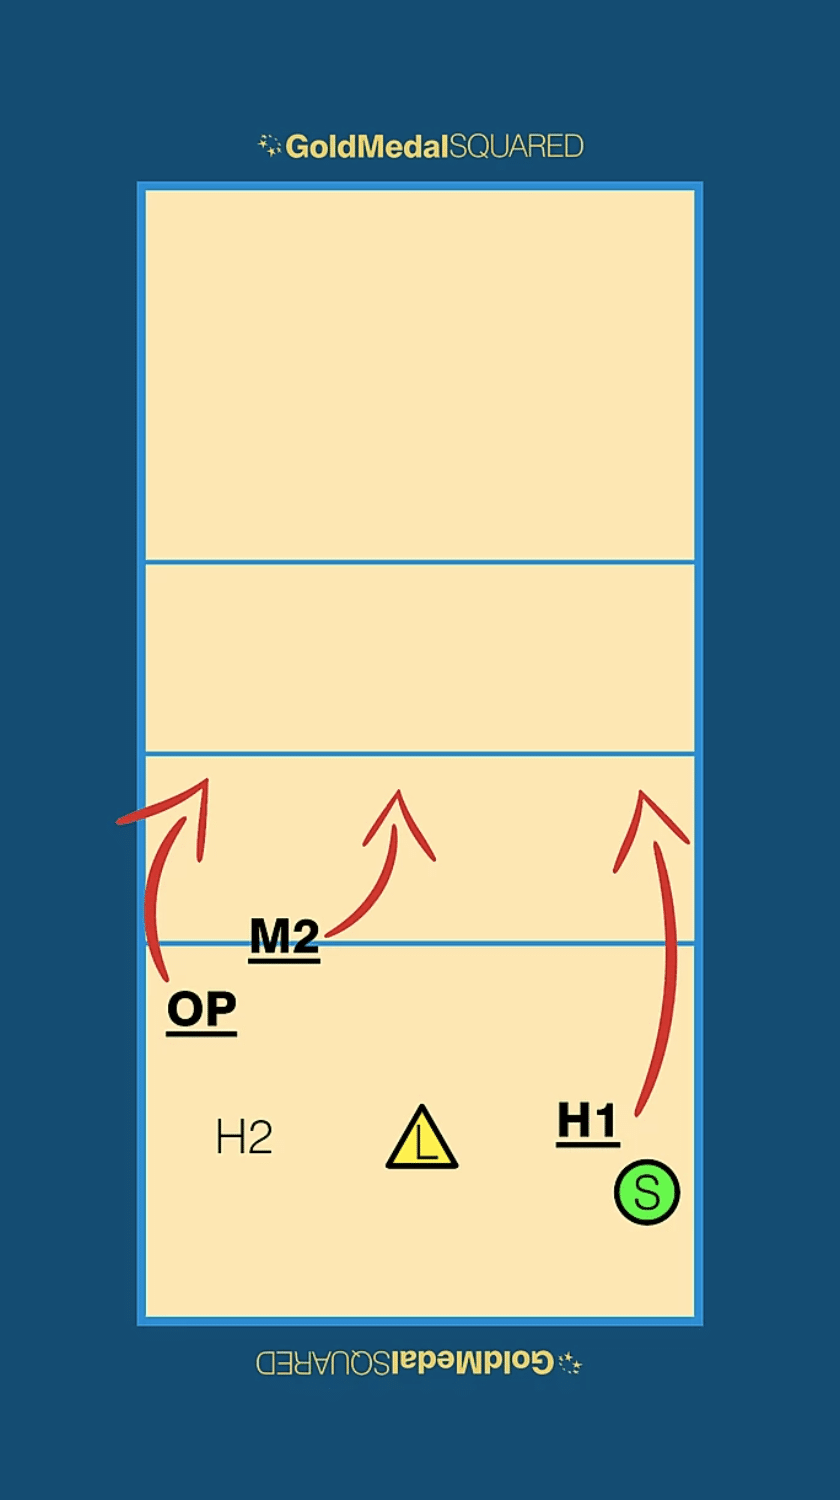
Player Assignments by Position:
S: Starts in Zone 1 behind the H1
H1: Passes in Zone 1 and hits Reds
M2: Starts in Zone 3/4 and hits Quicks/Gaps
OP: Starts in Zone 4 and hits Gos
H2: Passes in Zone 5
L: Passes in Zone 6
Advantages/Benefits of Rotation 1 in Volleyball:
- Many teams have three primary passers — Both outside hitters and the libero. This formation allows for those three players to pass in serve-receive.
- This allows the Libero to pass in Zone 6. We know that zone 6 is where we want our best passers to lineup whenever possible (due to the high number of serves that go there).
- This is a simple, straightforward offensive alignment. Go, Quick, Red. There mostly won’t be any traffic for your front row players to worry about as they take their offensive approaches.
Disadvantages/Drawbacks of Rotation 1 in Volleyball:
- This is the only time that the H1 hits from the right side, and the only time that the Opposite hits from the left side. If these two attackers aren’t comfortable or effective hitting from these locations, your team might struggle more than usual in this rotation.
- If the H1 is the best left side attacker on your team (she should be), having her attack from anywhere else might be problematic. However, she might also be the best right side attacker on your team. In which case, this formation might be problematic if your setter can’t set Reds as well as she can set Gos.
- For setters, starting deep in the court requires more them to cover more distance than in any other rotation.
Important Overlap Rules Considerations:
- The Setter must be behind the H1.
- The M2 must be to the right of the Opposite.
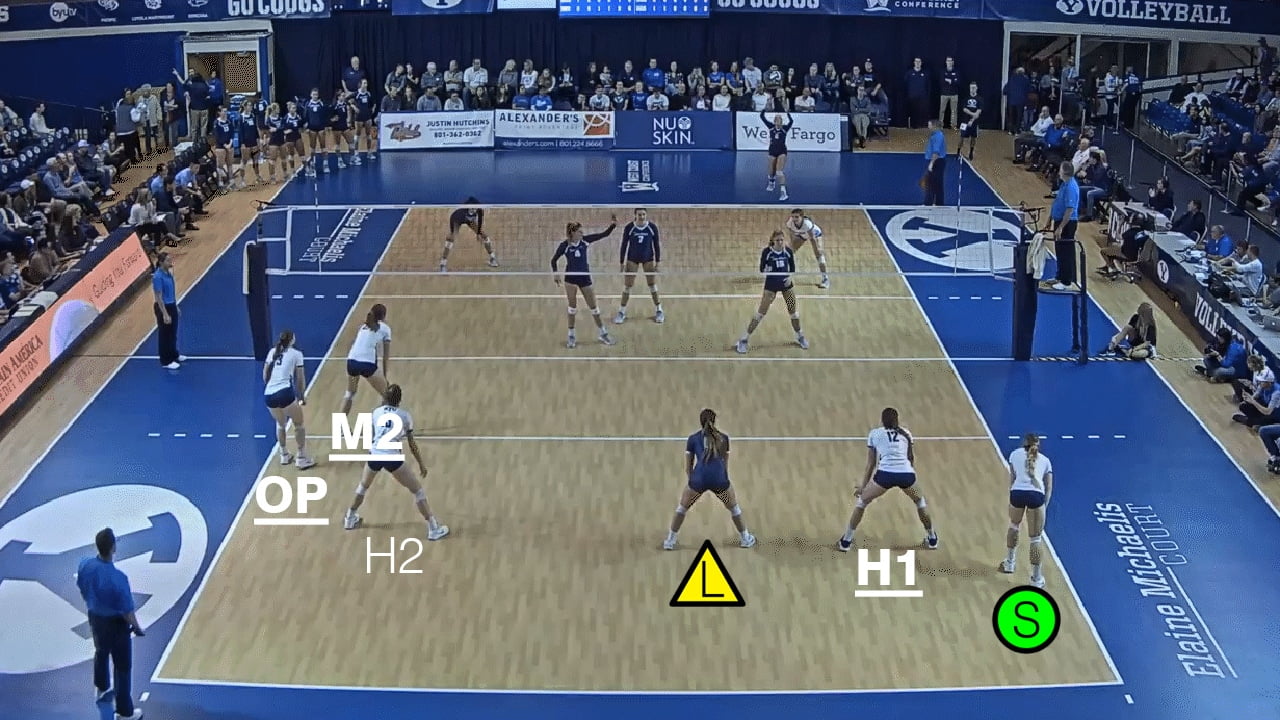
Rotation 1 with the OH1 Passing in Zone 1 and hitting a Red.
ROTATION 1 - Stack Serve-Receive Option
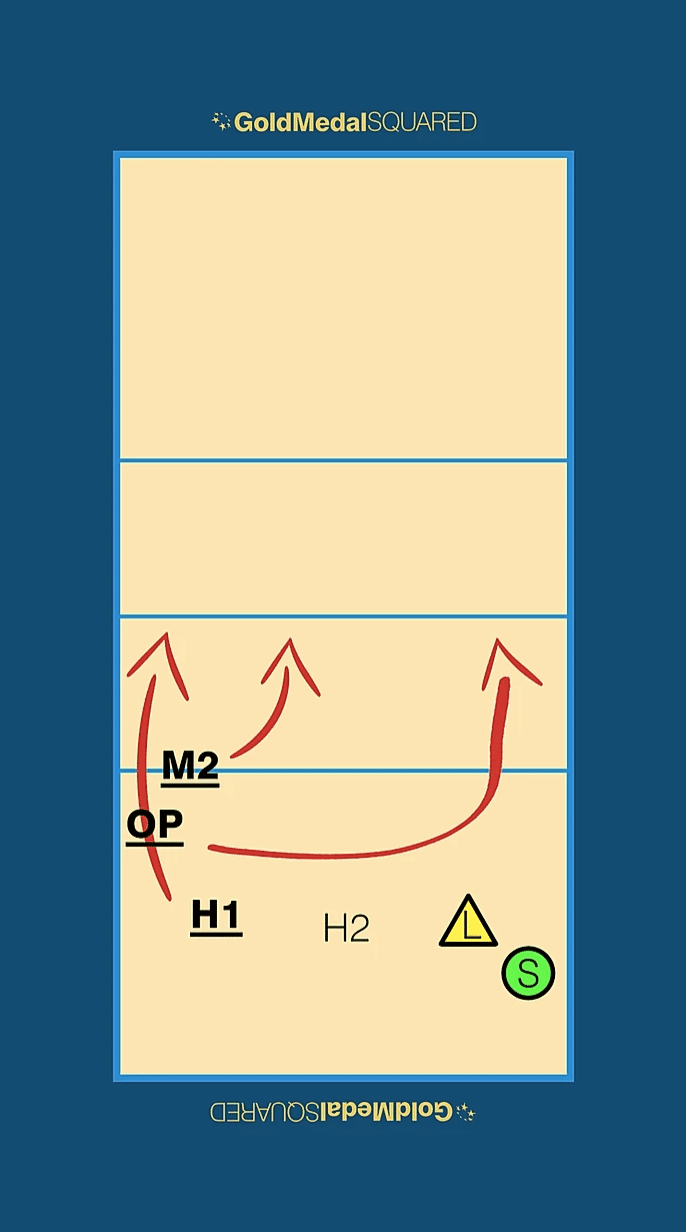
Player Assignments by Position:
S: Starts in Zone 1 behind the Libero
H1: Passes in Zone 5 and hits Gos
M2: Starts in Zone 4 and hits Quicks or Slides
OP: Starts in Zone 4 and hits 2s or Slides (whatever the M2 isn’t running)
H2: Passes in Zone 6
L: Passes in Zone 1
Advantages/Benefits:
- Your best outside hitter will be hitting Gos in this formation, which may be better than her hitting Reds.
- If your M2 or your Opposite is a good slide hitter, this formation could be tougher to defend that the traditional option because there is more movement for opposing blockers to be aware of.
- This formation gives you some different offensive options, which could be not only an effective addition to your offense, but a fun tweak for your players.
Disadvantages/Drawbacks:
- With all the front row hitters starting on the left side of the court, things might get crowded and chaotic once the opposing server serves the ball.
- A bad pass leaves you with very little options. On a bad pass, it will be nearly impossible to utilize the M2 or the Opposite.
- Your setter moving back to front will be crossing paths with some of the front row players as they move left to right.
- If you like your libero to take the majority of balls in Serve Recieve, you might not want to move your libero outside of the middle of the court.
Important Overlap Rules Considerations:
- The Setter must remain behind the H1, even though they’re across the court from each other.
- The M2 must be to the left of the passing H1.
- The Opposite must be to the left of the M2.
Explore Our Complete Series on Volleyball Rotations
Volleyball Rotations & Overlap Rules
Volleyball Rotation 1 (this post)


