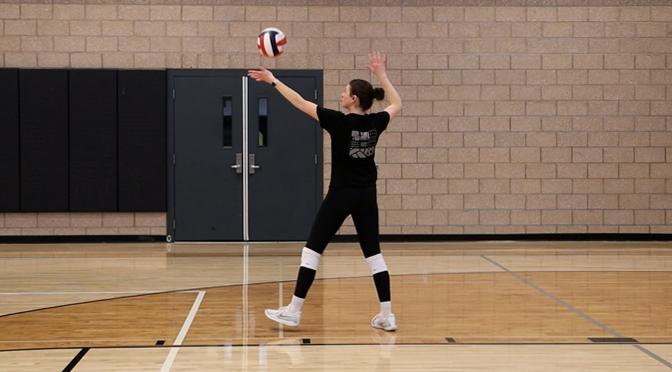
Learning How To Serve a Volleyball
Learning how to serve a volleyball is one of, if not the most important skills to master. It is one of the only skills that we have complete control over, which is why it’s important to dedicate time to learning how to do it correctly. In this article, you will learn the basics of a standing float serve, a one-handed jump float serve, a two-handed jump float serve, as well as a topspin jump serve.
No matter what type of volleyball serve you are learning it is important to keep in mind the following principles:
- Use torque to generate force.
- Focus on both speed AND accuracy.
- Simple > Complex. Our goal is to create simple and repeatable movements.
Below you will see a breakdown of each kind of serve in volleyball, along with teaching keys to help break down the skill. The following keys are written for a right-handed server. For left-handed servers, the keys remain the same but your footwork is the opposite. We will offer examples when outlining each type of serve below.
Teaching the Standing Float Serve:
A standing float serve is the most basic kind of overhand serve in volleyball. This is where a beginning volleyball player will typically start. A float serve simply means that after the ball is contacted it does not spin, but rather creates a floating motion. An aggressive float serve can be difficult to pass because the ball is “floating” or “moving” as it approaches the passer, making it difficult to read and/or track.
Keys for a standing float serve in volleyball:
- Arms in a bow and arrow position.
- Start with your body at a 45-degree angle.
- The ball should be in your non-hitting hand.
- Your elbow and shoulder are pulled back (this is your bow and arrow position).
- Place, Step, Hit OR Step, Place, Step, Hit
- Place the ball in front of your hitting shoulder. (We use the term place because we are simply placing the ball in front of our hitting arm.
- A high toss is unnecessary and will make your serve inconsistent.
- Contact the ball on the heel of your hand.
- Step and swing to target with torque. After you place the ball your first step should be with your left foot.
Teaching the Jump Serving
After you know the basics of an overhand serve, jump serving is the next step. For both the one-handed and two-handed jump serve you want to make sure that your arms stay in your bow and arrow position. This is different than a hitting approach, where you use your arms to gain height. A jump serve is still effective even if you are only getting a couple of inches off the ground! A one-handed jump serve and a two-handed jump serve are simply about preference. We recommend trying them both and seeing what works best for you.
One-Handed Float Jump Serve Keys:
- The ball is in your left hand with your left foot forward
- Standing at 45 degrees, your first step is with your right foot
- Step, Step, Toss, Step, Step (right, left, toss, right, left)
- Place the ball in front of your hitting arm
- Don’t swing arms when jumping, they stay up in bow and arrow position
- Contact the ball on the heel of your hand
- Swing to target with torque
Two-Handed Float Jump Serve Keys:
- Ball in two hands with your right foot slightly forward
- 1st step is with right foot
- Step, step, toss, step, step (right, left, toss, right, left)
- Place the ball in front of your hitting arm
- Don’t swing arms when jumping- they stay up in bow and arrow position
- Contact the ball on the heel of your hand
- Swing to target with torque
Jump Top Spin Serve:
The difference between the two jump float serves we just learned and a topspin serve is that a jump topspin serve DOES spin! Another key difference between a jump topspin serve and a jump float serve is that your arms and hands will drop for your full approach.
Jump Top Spin Keys:
- The ball is in your right hand and your right foot is slightly in front (your first step is with your right foot)
- Step, toss, and take the rest of the four-step approach and hit the ball (right, left, right, left)
- Give yourself a high toss, this allows you to jump into the court.
- Your steps should follow these patterns to gain momentum: small, bigger, biggest and slow, faster, fastest.
- Swing to target with torque
